|
IntroductioniOS has very powerful APIs for tracking user locations and working with maps. You might be making an app for your local café and want to notify the user of special offers when they are nearby. Or, you’re making a music player and you want to start playing some bouncy beats when the user enters a gym. Tracking location all the time, however, can drain a battery really fast! In this Core Location tutorial, you’ll learn how to use some of the lesser-known, but very powerful, capabilities of the framework. You’ll learn how to create an app that logs user movements during the day but also doesn’t drain much of a device’s battery. In this tutorial, you’ll make a travel logging app. Imagine you’re traveling to a new city. Instead of keeping a journal, this app will automatically track locations you visit, so you can remember them later and compare them with your friends. Here’s what this app will do:
Without further ado, it’s time to get into it. Getting StartedFirst, download the project materials using the Download Materials link at the top or bottom of this tutorial. Open the starter project. Right now, the app doesn’t do much. On the first tab, you have an empty list with locations. On the second tab, you’ll see an empty map view.
Here’s what’s in the starter project: AppDelegate.swiftYou have two additional imports at the top of the file:
import CoreLocation
import UserNotifications
The CoreLocation framework listens to user location updates. You’ll use the UserNotifications framework to show banner notifications when the app logs a new location. You can also see two extra properties in the class declaration:
let center = UNUserNotificationCenter.current()
let locationManager = CLLocationManager()
Through these two properties, you’ll access the API of the two frameworks above. PlacesTableViewController.swiftThis is the first tab of the app — the MapViewController.swiftThis is the view controller for the second tab. You have the Location.swiftThis is the model class. It has five stored properties:
let latitude: Double
let longitude: Double
let date: Date
let dateString: String
let description: String
There is also a computed property to convert the There are two initializers for this class; you’ll learn about them later in this tutorial. You need to save objects of this class on disk. In order to do that, this class conforms to LocationsStorage.swiftLast but not least, with this singleton, you’ll save locations to the documents folder of the app. This class has a couple of properties to do the writing and reading from the disk:
private let fileManager: FileManager
private let documentsURL: URL
It also has a property to access all logged locations, which, for now, is set to an empty array in the initializer:
private(set) var locations: [Location]
Now that you’re up to speed with the initial code, it’s time to add some new code! Core Location: Asking for User LocationsThe first step is to ask permission to track the user’s location. In the age of privacy scandals, Apple stands pretty strong on keeping users in charge of which data an app can gather. That’s why it is very important to properly ask users to allow the app access to gather the required data. Providing a Proper DescriptionTo gather location changes data, you need to set two special strings in the Info.plist file:
The app presents these strings when it asks for permission. Feel free to change the prompts to any text you like as long as the text fulfills the following requirements:
Asking for Locations PermissionsOpen AppDelegate.swift and add this line before the return statement in
locationManager.requestAlwaysAuthorization()
With this line, you ask users to allow the app to access location data both in the background and the foreground. Build and run the project. You should get a dialog similar to this one, but it will include the strings you set in the Info.plist file earlier in the tutorial:
Tap Always Allow.
Note: The user may restrict the access to location data for background or for both; in this case, it’s the developer’s responsibility to gracefully handle those cases properly. To keep things simple for this tutorial, you’ll assume that the user selects Always Allow.
Asking for Notifications PermissionsLocation permissions are not the only permissions you need: To show a user notifications, you need to ask permission. To do so, you don’t have to specify any additional strings. Just add this code right above the line you just added:
center.requestAuthorization(options: [.alert, .sound]) { granted, error in
}
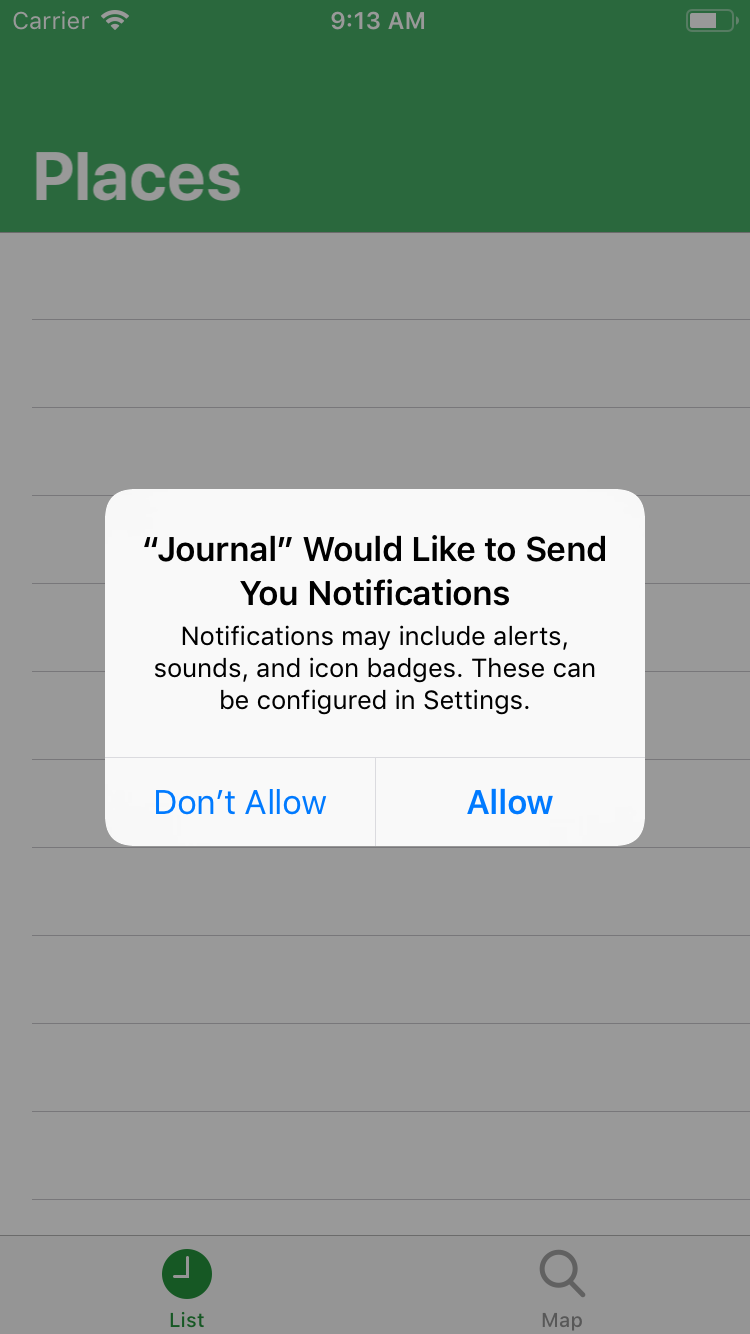
Here, you pass options to specify what kind of notifications you want to post. You also include an empty closure because you assume, for this tutorial, that users always give you permission. You can handle the denial in this closure. Build and run. You should see this dialog:
Tap Allow. Choosing the Most Appropriate Locations DataThe Core Location framework has many ways to track a user’s location and each has different characteristics:
None of these is fully suitable for your app. Low battery impact is a must — a user is unlikely to use the app otherwise. What’s more, regional monitoring is also undesirable because you limit user movement to some specific regions. Fortunately, there is one other API you can use. Visit MonitoringVisit monitoring allows you to track destinations — places where the user stops for a while. It wakes the app whenever a new visit is detected and is very energy efficient and not tied to any landmark. Subscribe to Location ChangesNow that you know which of the many Core Location APIs you’ll use to get the user’s location, it’s time to start implementing it! CLLocationManagerIn the AppDelegate.swift, below this line:
locationManager.requestAlwaysAuthorization()
add the following code:
locationManager.startMonitoringVisits()
locationManager.delegate = self
The first line initiates the listening feature. Core Location uses delegate callbacks to inform you of location changes. Now, add this extension at the bottom of the file:
extension AppDelegate: CLLocationManagerDelegate {
  func locationManager(_ manager: CLLocationManager, didVisit visit: CLVisit) {
    // create CLLocation from the coordinates of CLVisit
    let clLocation = CLLocation(latitude: visit.coordinate.latitude, longitude: visit.coordinate.longitude)

    // Get location description
  }

  func newVisitReceived(_ visit: CLVisit, description: String) {
    let location = Location(visit: visit, descriptionString: description)

    // Save location to disk
  }
}
The first method is the callback from
You need to create a
init(_ location: CLLocationCoordinate2D, date: Date, descriptionString: String)
The only thing missing in the above is Location DescriptionTo get the description, you will use Still in AppDelegate.swift, add this property at the top of the class:
static let geoCoder = CLGeocoder()
Now, at the bottom of
AppDelegate.geoCoder.reverseGeocodeLocation(clLocation) { placemarks, _ in
  if let place = placemarks?.first {
    let description = "\(place)"
    self.newVisitReceived(visit, description: description)
  }
}
Here, you ask Sending Local NotificationsNow, it’s time to notify a user when the new visit location is logged. At the bottom of
// 1
let content = UNMutableNotificationContent()
content.title = "New Journal entry
With the above, you:
Build and run the app. At this point, the app is usable in that it logs visits and notifies the user. If you are using a real device and have some time for a walk, you can test your work right now. Go some place and stop to have a coffee. Visits require you remain at a place for some period of time. You should receive some notifications, like this:
The visits are being recorded, but the visits are not yet persisted. Faking Data (Optional)Walking is good for your body, but it might be a problem to do it right now in the middle of building this app! To test the app without actually walking, you can use the Route.gpx file. This kind of file allows you to simulate the device or simulator GPS location. This particular file will simulate a walk around Apple’s campus in Cupertino. To use it, in the Debug area, click the “Simulate Location” icon, and then select “Route” from the list:
You can open the tab with a map or Maps app to see the walking route. Faking CLVisitsiOS records Add this to the end of AppDelegate.swift:
final class FakeVisit: CLVisit {
  private let myCoordinates: CLLocationCoordinate2D
  private let myArrivalDate: Date
  private let myDepartureDate: Date

  override var coordinate: CLLocationCoordinate2D {
    return myCoordinates
  }

  override var arrivalDate: Date {
    return myArrivalDate
  }

  override var departureDate: Date {
    return myDepartureDate
  }

  init(coordinates: CLLocationCoordinate2D, arrivalDate: Date, departureDate: Date) {
    myCoordinates = coordinates
    myArrivalDate = arrivalDate
    myDepartureDate = departureDate
    super.init()
  }

  required init?(coder aDecoder: NSCoder) {
    fatalError("init(coder:) has not been implemented")
  }
}
With this subclass, you can provide initial values for Set Up locationManagerNow you need the
// 1
locationManager.distanceFilter = 35

// 2
locationManager.allowsBackgroundLocationUpdates = true

// 3
locationManager.startUpdatingLocation()
Here’s what these lines do:
You can comment out these 3 lines to turn off the visits faking. Handle Fake VisitsIt’s time to handle the location callback. For this, add the following code to
func locationManager(_ manager: CLLocationManager, didUpdateLocations locations: [CLLocation]) {
    // 1
    guard let location = locations.first else {
      return
    }

    // 2
    AppDelegate.geoCoder.reverseGeocodeLocation(location) { placemarks, _ in
    if let place = placemarks?.first {
      // 3
      let description = "Fake visit: \(place)"

      //4
      let fakeVisit = FakeVisit(
        coordinates: location.coordinate,
        arrivalDate: Date(),
        departureDate: Date())
      self.newVisitReceived(fakeVisit, description: description)
    }
  }
}
Build and run the app. Turn on the Route location simulation. Close the app or lock your iPhone and you should get a new notification around once per minute.
Persisting Location DataTo save the visited locations, you’ll use Swift’s Saving Records on DiskOpen LocationsStorage.swift. At the bottom of the class, add the following function:
func saveLocationOnDisk(_ location: Location) {
  // 1
  let encoder = JSONEncoder()
  let timestamp = location.date.timeIntervalSince1970

  // 2
  let fileURL = documentsURL.appendingPathComponent("\(timestamp)")

  // 3
  let data = try! encoder.encode(location)

  // 4
  try! data.write(to: fileURL)

  // 5
  locations.append(location)
}
Here’s what you do with that code:
Note: For simplicity, this tutorial simply assumes the JSON conversion and the writing the file will succeed. You should always implement a proper error handling strategy in your production code.
Now, open AppDelegate.swift and inside
let location = Location(visit: visit, descriptionString: description)
add this:
LocationsStorage.shared.saveLocationOnDisk(location)
Now, whenever the app receives a visit, it will grab the location description, create a Location object and save it to disk. To test this, you need to do the following two things:
Saving a Current LocationTo save the current location, open MapViewController.swift. Inside of
guard let currentLocation = mapView.userLocation.location else {
  return
}

LocationsStorage.shared.saveCLLocationToDisk(currentLocation)
As you can see, there is no
func saveCLLocationToDisk(_ clLocation: CLLocation) {
  let currentDate = Date()
  AppDelegate.geoCoder.reverseGeocodeLocation(clLocation) { placemarks, _ in
    if let place = placemarks?.first {
      let location = Location(clLocation.coordinate, date: currentDate, descriptionString: "\(place)")
      self.saveLocationOnDisk(location)
    }
  }
}
Here, you create a Now, inside of the initializer, replace this line:
self.locations = []
with this:
let jsonDecoder = JSONDecoder()

// 1
let locationFilesURLs = try! fileManager
  .contentsOfDirectory(at: documentsURL, includingPropertiesForKeys: nil)
locations = locationFilesURLs.compactMap { url -> Location? in
  // 2
  guard !url.absoluteString.contains(".DS_Store") else {
    return nil
  }
  // 3
  guard let data = try? Data(contentsOf: url) else {
    return nil
  }
  // 4
  return try? jsonDecoder.decode(Location.self, from: data)
  // 5
  }.sorted(by: { $0.date < $1.date })
With this code, you:
With this code, when the app launches, Setting up the App to Use Stored DataSetting up a Table ViewEnough with the boring behind-the-scenes stuff!
Now, it’s time for you to see the results. For this, open PlacesTableViewController.swift. Replace
override func tableView(_ tableView: UITableView, cellForRowAt indexPath: IndexPath) -> UITableViewCell {
  let cell = tableView.dequeueReusableCell(withIdentifier: "PlaceCell", for: indexPath)
  let location = LocationsStorage.shared.locations[indexPath.row]
  cell.textLabel?.numberOfLines = 3
  cell.textLabel?.text = location.description
  cell.detailTextLabel?.text = location.dateString
  return cell
}
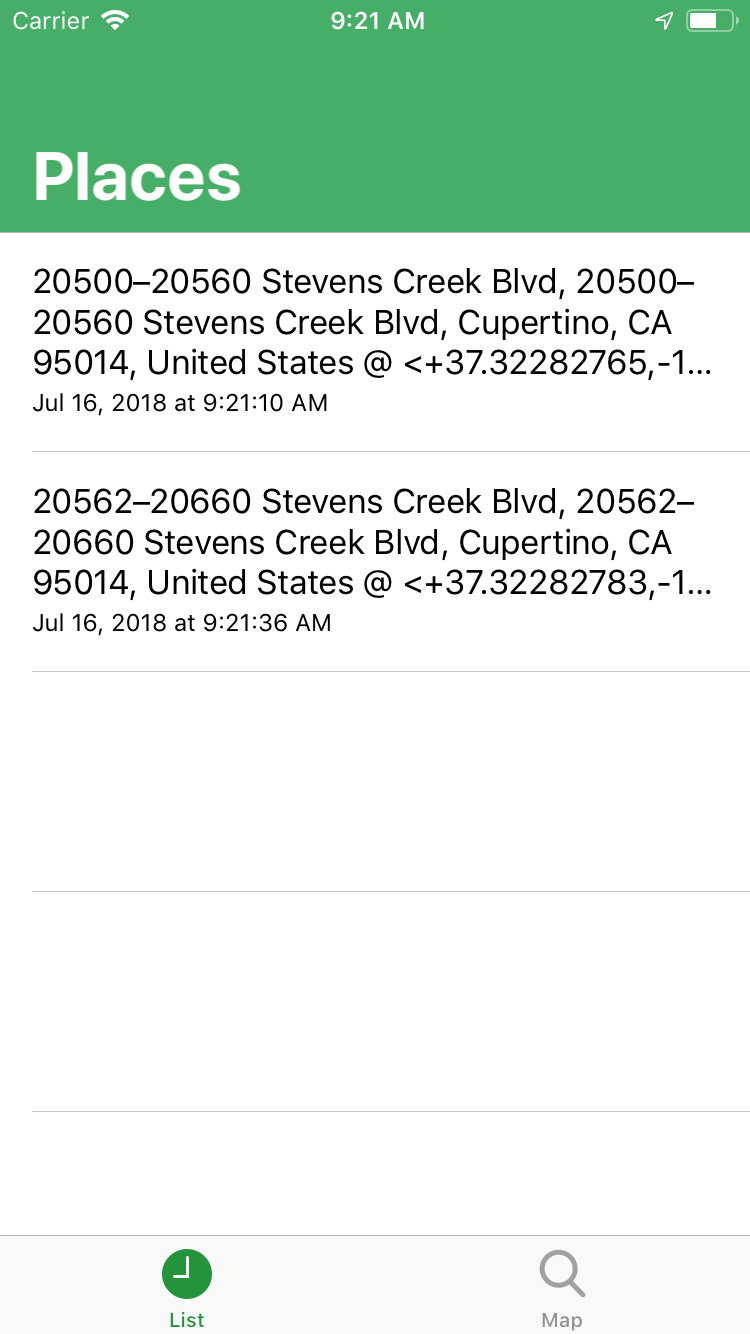
Build and run the app. You’ll see something similar to this:
If you don’t have any recorded visits, try saving them manually on the second tab and build run the app again. As you can see, in order to update the list, you need to re-run the app. You’ll fix this next. Updating the List When a Location is LoggedTo keep the list updated, you need to post a notification for the app to know that a new location was recorded. Please note, however, that this is not Open LocationsStorage.swift. At the bottom of the file, add this extension:
extension Notification.Name {
  static let newLocationSaved = Notification.Name("newLocationSaved")
}
This is the notification that you will post. Now, at the end of
NotificationCenter.default.post(name: .newLocationSaved, object: self, userInfo: ["location": location])
Next, you need to listen to this notification in Navigate to PlacesTableViewController.swift, and add the following code at the top of the class:
override func viewDidLoad() {
  super.viewDidLoad()

  // 1
  NotificationCenter.default.addObserver(
    self,
    selector: #selector(newLocationAdded(_:)),
    name: .newLocationSaved,
    object: nil)
}

// 2
@objc func newLocationAdded(_ notification: Notification) {
  // 3
  tableView.reloadData()
}
With the above code, you:
Build and run the app. To save your current location, tap the plus button on the second tab. Opening the first tab, you should see that number of locations has increased:
Setting up MapView With All Logged LocationsThe final part of this tutorial will show you how to display locations on a map with pins. To add pins to the map, you need to convert locations to Open MapViewController.swift and add this method to the end of the class:
func annotationForLocation(_ location: Location) -> MKAnnotation {
  let annotation = MKPointAnnotation()
  annotation.title = location.dateString
  annotation.coordinate = location.coordinates
  return annotation
}
This creates a pin annotation with a title and coordinates. Now, at the end of
let annotations = LocationsStorage.shared.locations.map { annotationForLocation($0) }
mapView.addAnnotations(annotations)
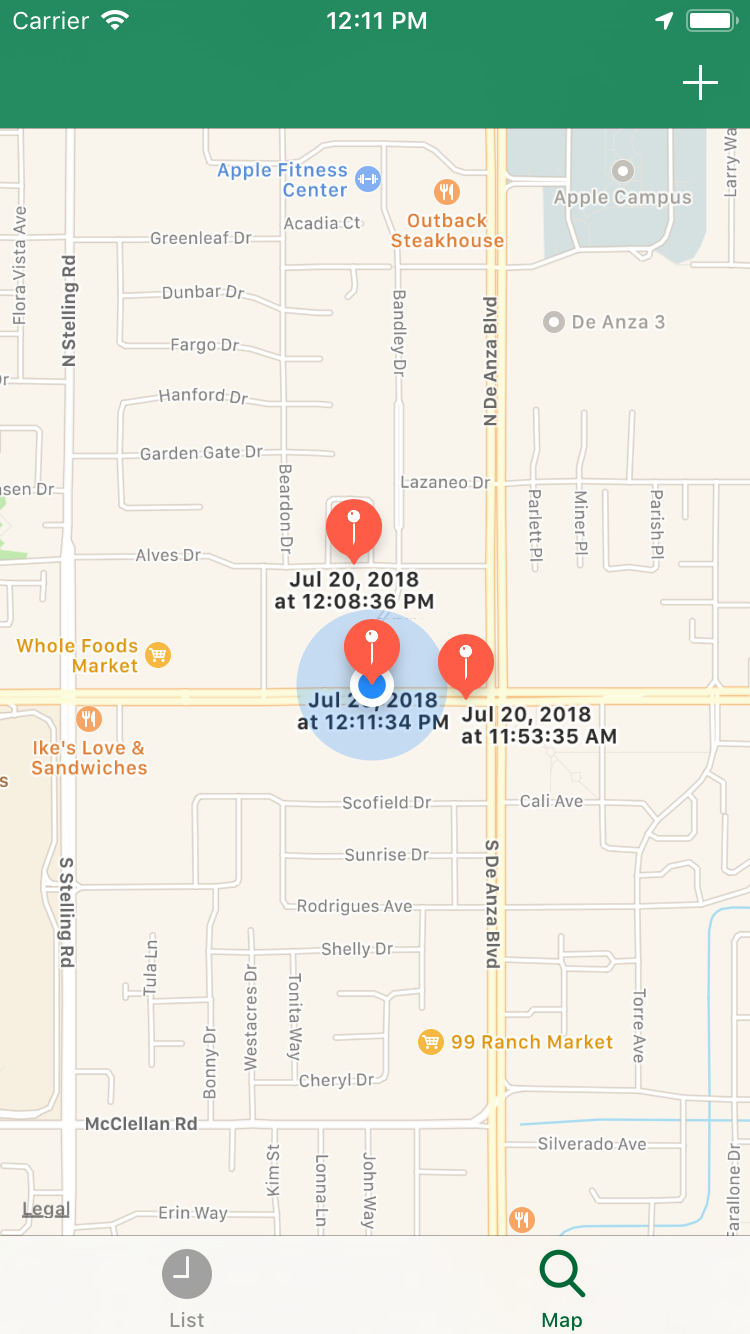
This code generates pins from locations that you’ve already created and adds them to the map. Build and run the app. You should see pins on the map, like this:
The only thing left to do is to add a pin when a new location is logged. To do this, add the following function at the end of
@objc func newLocationAdded(_ notification: Notification) {
  guard let location = notification.userInfo?["location"] as? Location else {
    return
  }

  let annotation = annotationForLocation(location)
  mapView.addAnnotation(annotation)
}
Similarly to the first tab, you need to listen for the notification in order to know when this new location is recorded. To subscribe to this notification, add this code to the end of
NotificationCenter.default.addObserver(
  self,
  selector: #selector(newLocationAdded(_:)),
  name: .newLocationSaved,
  object: nil)
Build and run the app. Log a new location on the second tab. A pin should appear on the map:
And that’s your travel logger done! Feel free to walk around town and see what places it records! This feature enables you to see and react to where the user is going without draining too much battery. Just keep in mind that the data you’re collecting is sensitive data, so collect it responsibly. Where to Go From Here?You can download the completed version of the project using the Download Materials button at the top or bottom of this tutorial. To deepen your understanding on this topic, check out these useful resources: As always, if you have any questions or comments, feel free to post in the discussion forum below. :] The post Core Location Tutorial for iOS: Tracking Visited Locations appeared first on Ray Wenderlich. Core Location Tutorial for iOS: Tracking Visited Locations published first on https://medium.com/@koresol via Tumblr Core Location Tutorial for iOS: Tracking Visited Locations
0 Comments
Leave a Reply. |
IYAR
I have worked out on Web Platform Team at leading software company, but this blog IYAR, its content and opinions are my own. I blog about technology, culture, gadgets, diversity, code, the web, where we're going and where we've been. I'm excited about community, social equity, media, entrepreneurship and above all, the open web. Personal Links |


 "
content.body = location.description
content.sound = .default
// 2
let trigger = UNTimeIntervalNotificationTrigger(timeInterval: 1, repeats: false)
let request = UNNotificationRequest(identifier: location.dateString, content: content, trigger: trigger)
// 3
center.add(request, withCompletionHandler: nil)
"
content.body = location.description
content.sound = .default
// 2
let trigger = UNTimeIntervalNotificationTrigger(timeInterval: 1, repeats: false)
let request = UNNotificationRequest(identifier: location.dateString, content: content, trigger: trigger)
// 3
center.add(request, withCompletionHandler: nil)


 .
.


 RSS Feed
